

Welcome to the DIY Watch Assembly Instruction
In the next two hours, you will dive into the world of watchmaking.
Please relax, take your time, and enjoy the fun of the craft of watchmaking!
Diver 40mm Assembly Instructions
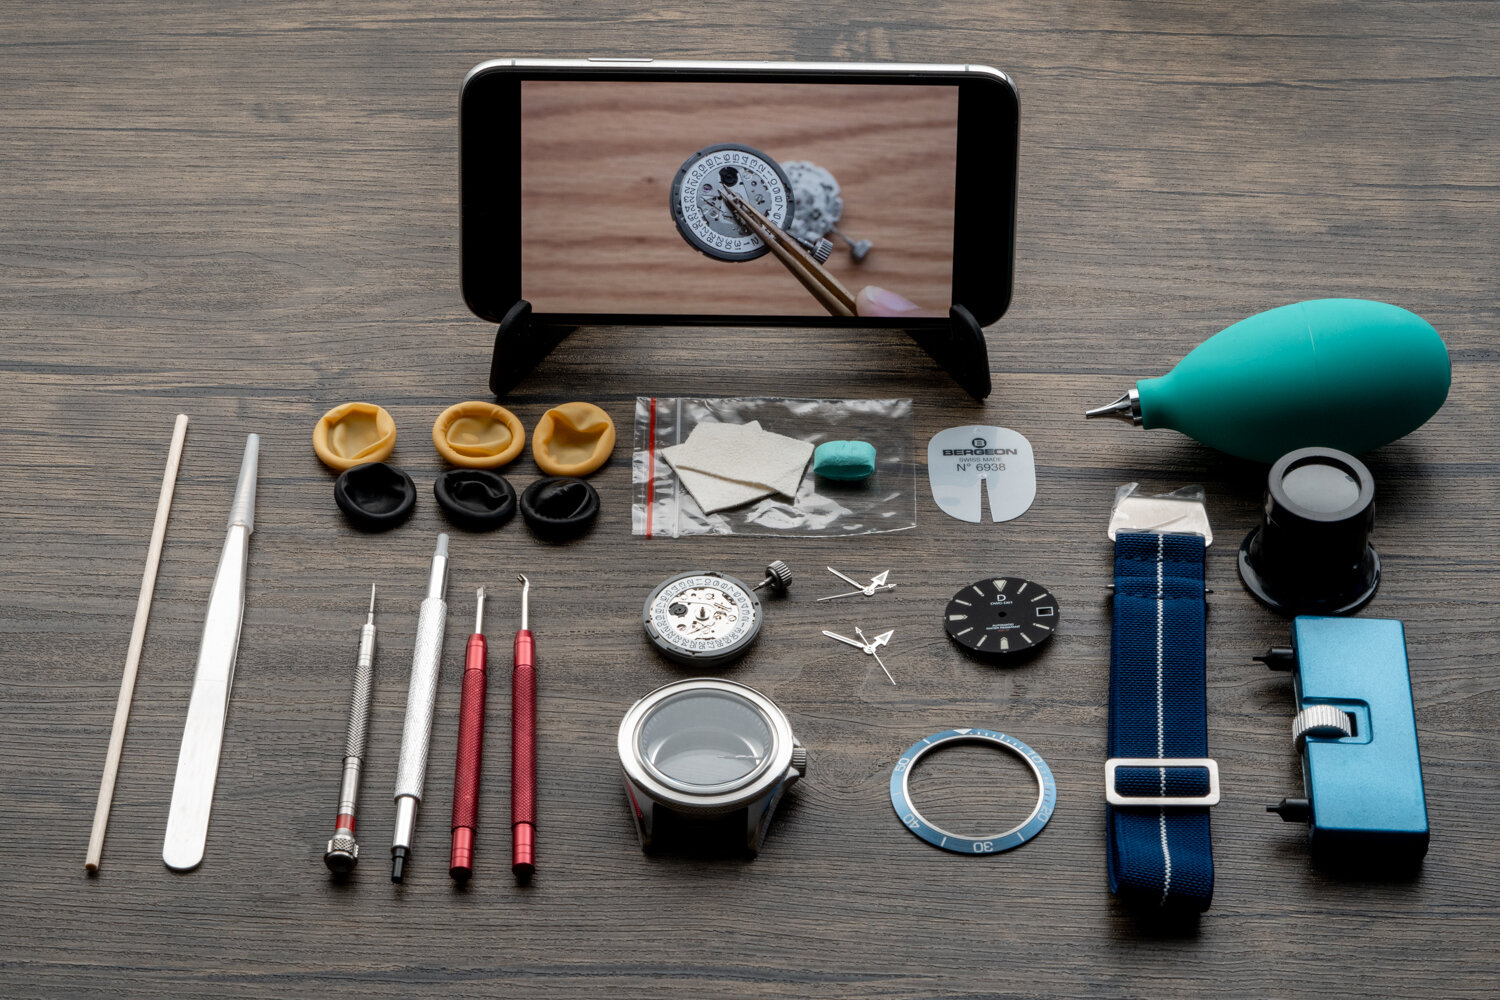
Before starting, you can familiarize yourself with the tools and parts needed:
Parts:
watch case
bezel insert
crown and stem
movement holder
chapter ring
dial
hands
movement
gasket
strap
quick release spring bars (optional depending on strap type)
Tools:
tweezers
finger cots
hand pump
suede
Rodico
loupe
case opener
hand removal tools
protective film for hand removal
hand setting tool
peg wood
screwdriver
1: Dial and Movement Assembly Installation
Introduction: how to use mechanical watches with date
This is a brief introduction to the basics of a mechanical watch with date function, which might prove useful in your subsequent installation.
If you are already familiar with how a mechanical watch works, feel free to skip this video and proceed to the next one.
Content:
crown position for setting date
when to avoid setting date
how to determine AM/PM
1a. Opening the package and wearing finger cots
Introduction to what’s inside the package, and how to wear finger cots to protect the movement.
Content:
introduce package content
how to wear finger cots, and why
1b. Preparing case parts
Your watch case comes pre-assembled in order to keep it clean. This part will show you the individual parts of a case.
Content:
How to open case back
How to place parts
1c. Precautions during movement installation
Mechanical movement is the soul of a watch. It takes great care to install it. In this part, we’ll show you what to be mindful of when you install the movement.
Content:
Introduction of different parts of a movement
Areas you should not touch
Areas you can apply pressure on
1d. Removal and installation of stem and crown
Watch assembly and basic watch repair require you to install and remove the stem and crown. You will need to do this multiple times throughout this workshop.
Content:
Function of crown
How to remove and install crown
1e. Installing dial
Please choose below the type of dial you’re assembling:
In this part, we will install the dial. After assembling them, we will proceed to the next part, where we install the watch hands.
Content:
Install dial onto the movement

Your sandwich dial has a top and bottom layer. Normally they should come assembled in the kit, but if they fall off, you can reassemble them by aligning the feet and hole indicated by the arrows.
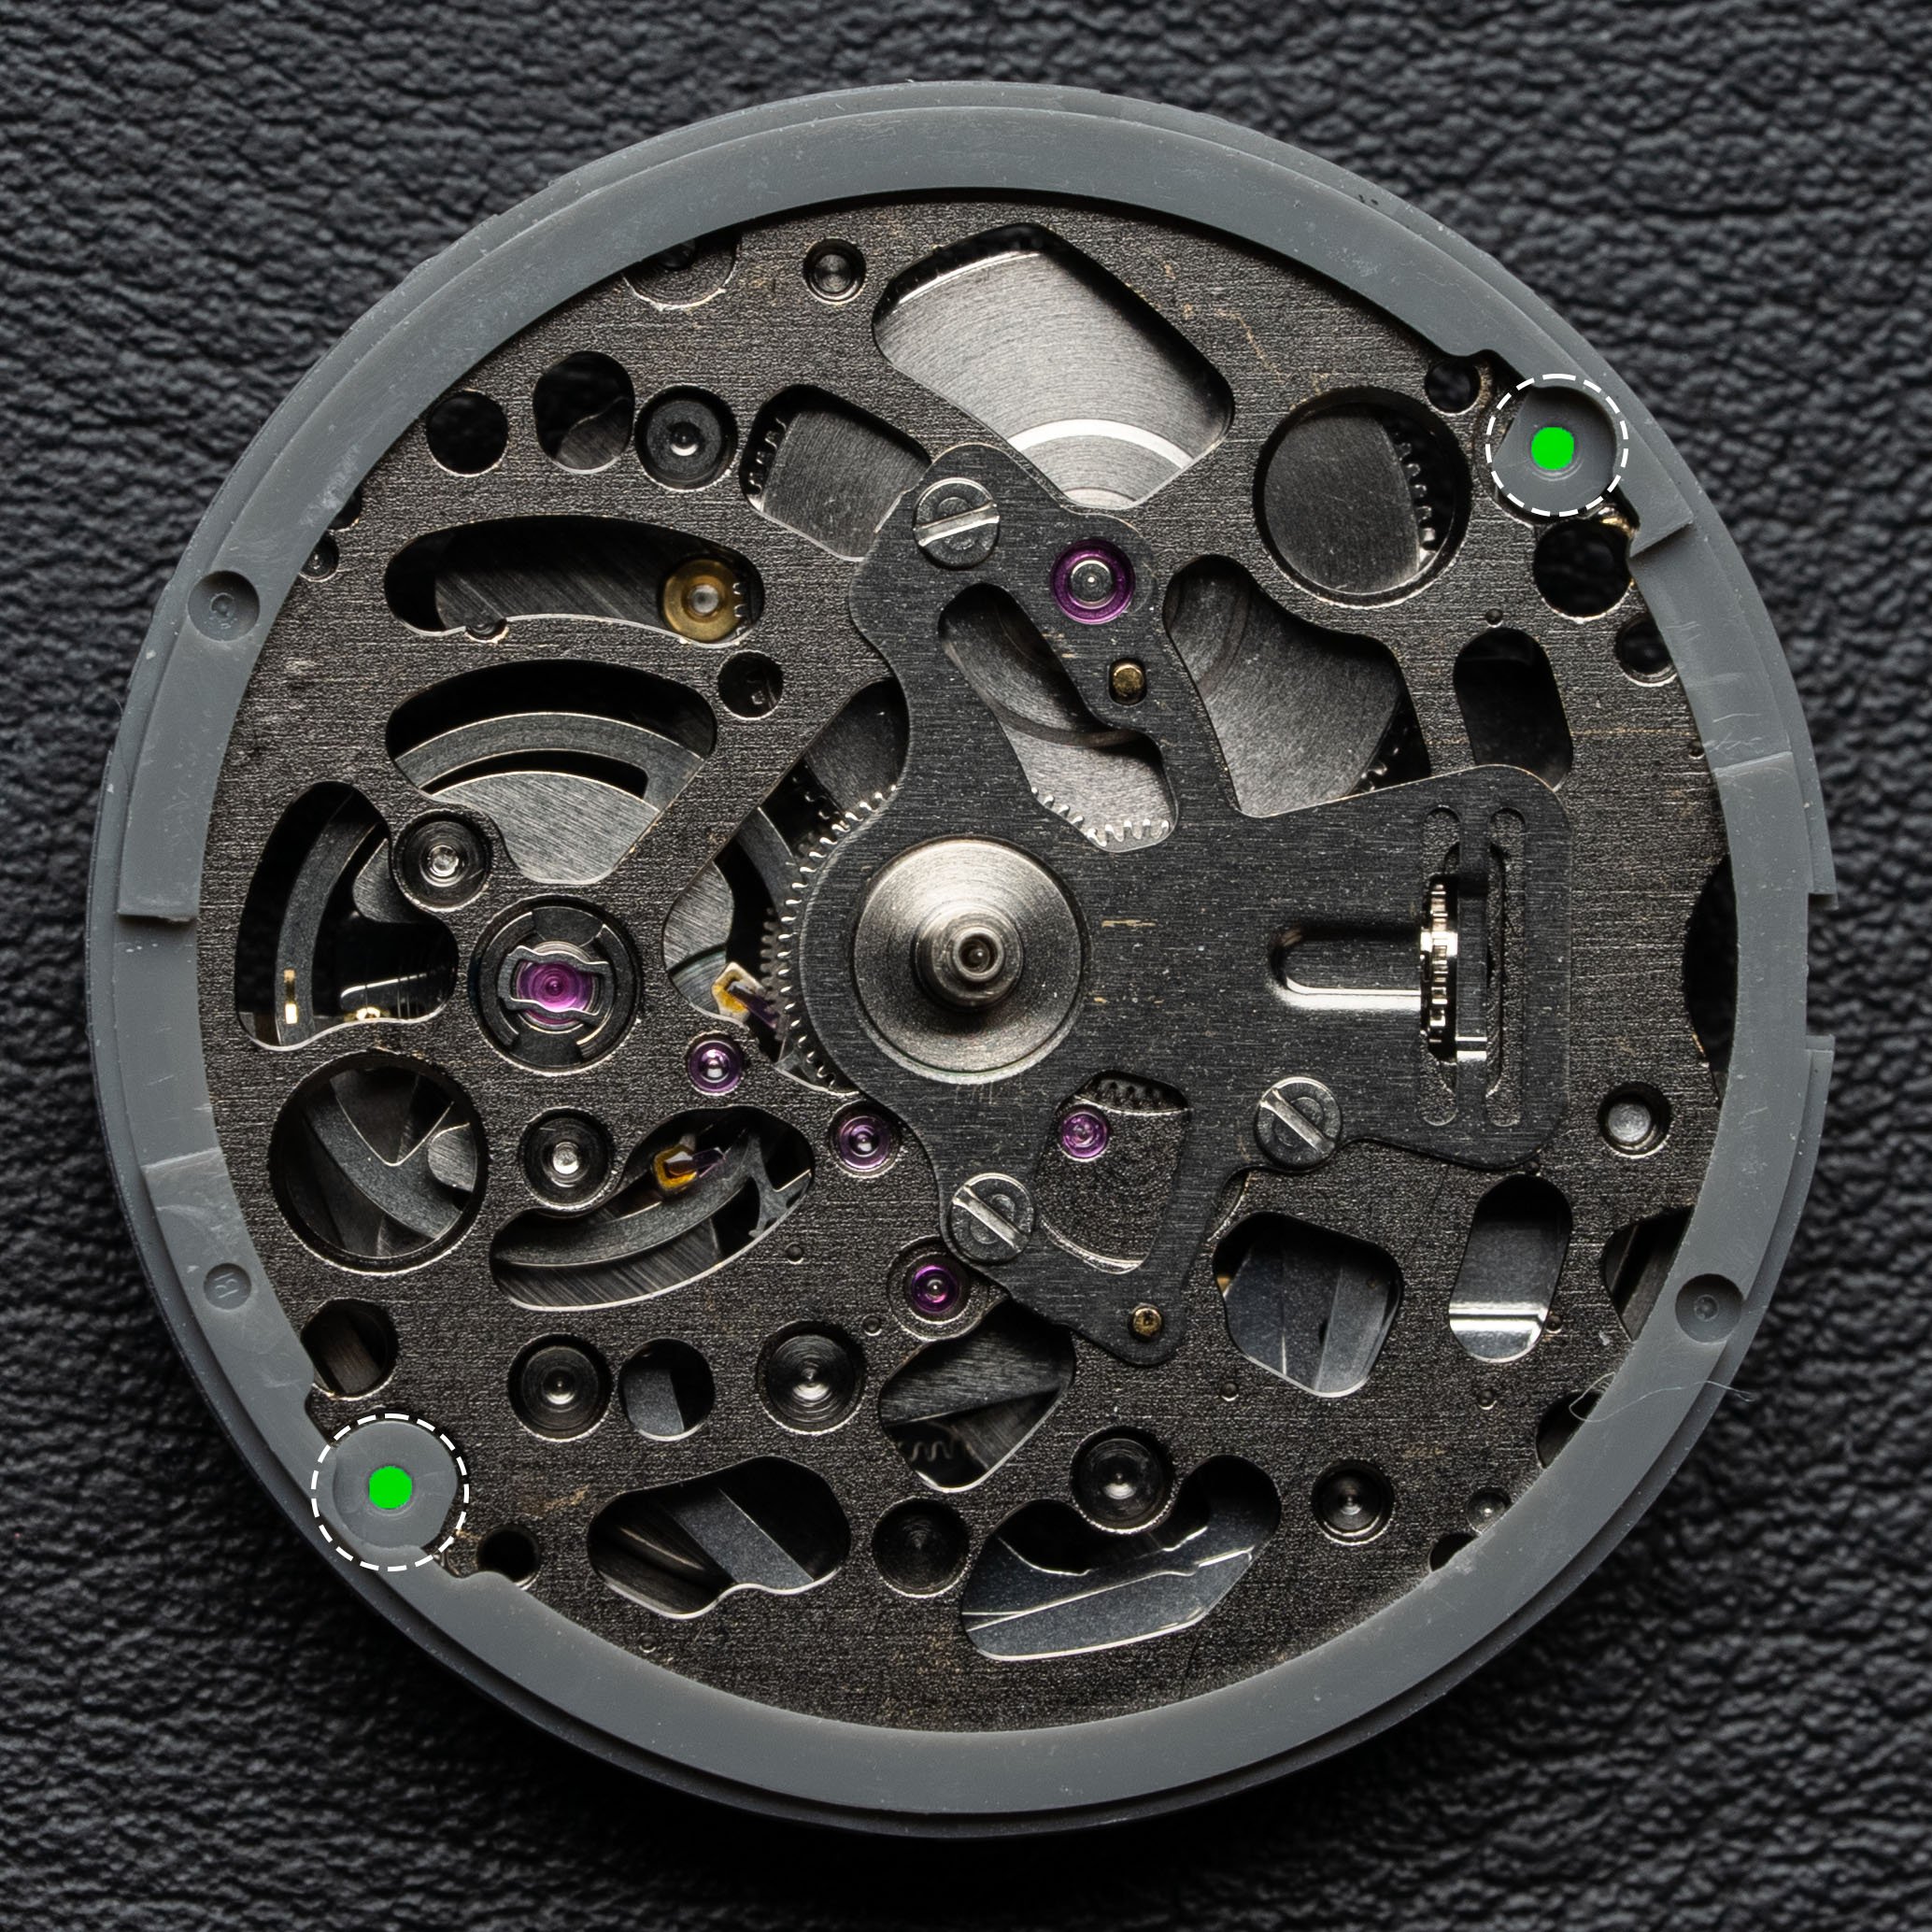
The following pictures indicate the movement dial holes (green spot):
NH35 movement
NH70 & NH72 movement
Optional: How to remove the dial
To remove the dial, simply use a screw driver, and insert it in between the dial and the movement or movement holder. Inserting the screw driver next to the dial feet will give you a better control. For Seiko NH movements, you can find slots on the movement holder for this purpose.
In this part, we will install the sapphire dial. After assembling them, we will proceed to the next part, where we install the watch hands.
Content:
Install sapphire dial onto the movement
Learn how to remove the dial safely
2: Hand Installation and Adjustment
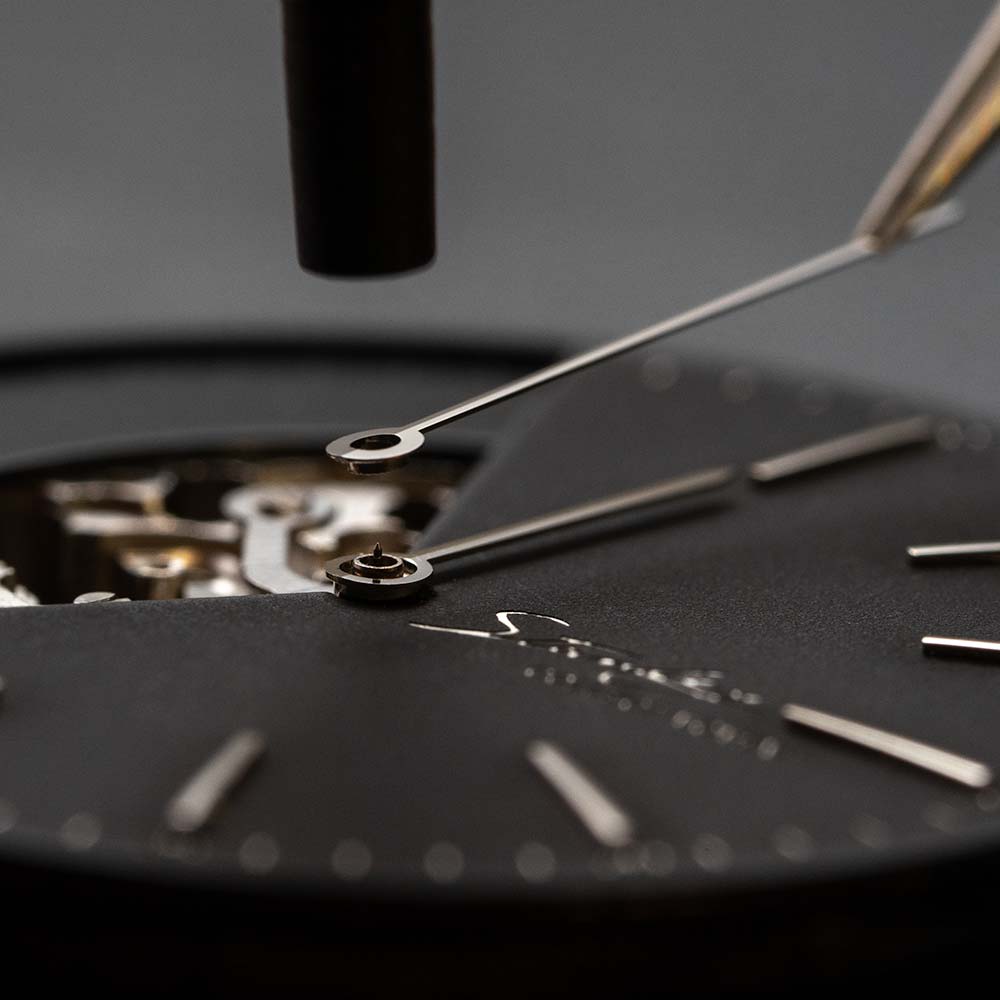
If this is your first time installing hands, it might be quite difficult. You can take a break first before continuing.
3: Installing Case and Other Parts
[Optional] Bleaching bezel insert
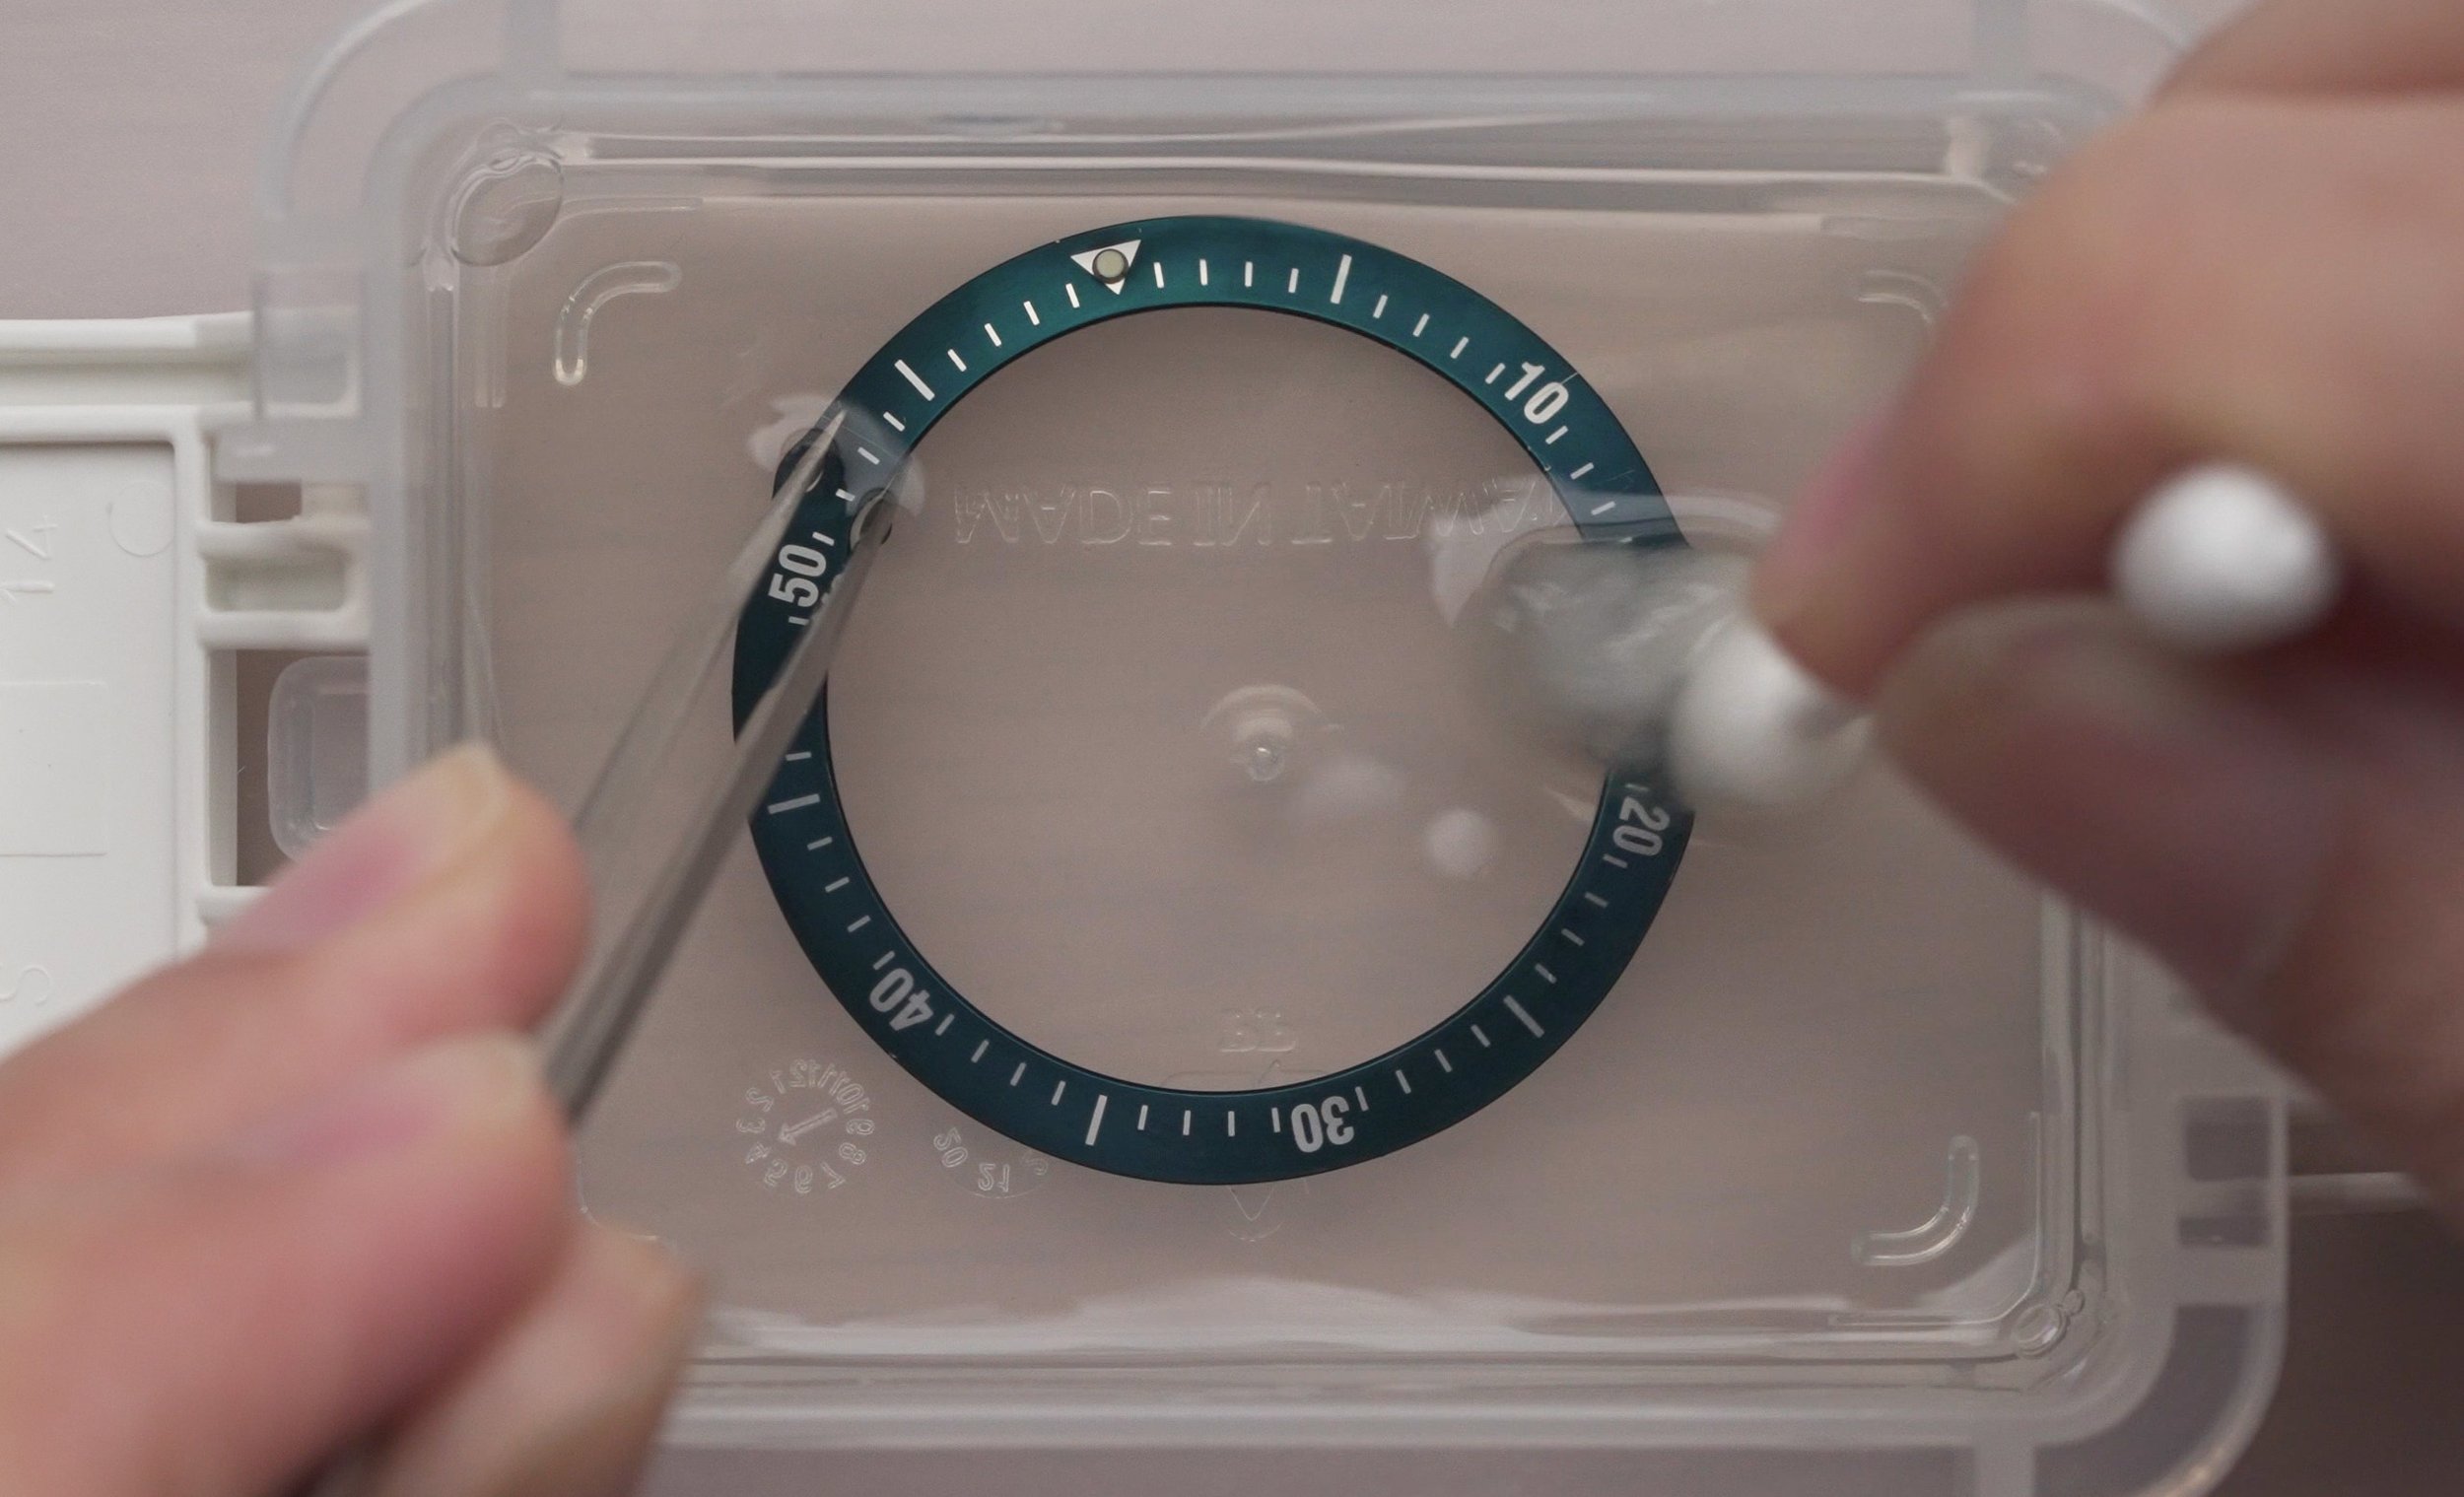
Before installing your case, you can opt to give your bezel insert a faded look by carrying out a process called “bleaching”. Learn how to do it via the button below:
3a. Cleaning parts and movement assembly
Instruction on how to clean parts and movement assembly
Content:
Using hand pump
Using rodico
Using peg wood
3b. Cleaning watch case
In this part, we will clean the watch case
Content:
Avoid touching the inside of case
Using rodico, peg wood, and suede for cleaning
3c. Installing chapter ring and watch case
In this part, we will install the movement assembly with hands into the case
Content:
Installing assembly
Aligning movement and stem
Installing case back
3d. (optional) Installing custom rotor
If you have customised a rotor, replace the factory default rotor with your custom rotor.
Content:
Finding the right screwdriver
Removing the rotor
Putting on the new rotor
For Seiko rotor:
3e. (optional) Switching bezels.
This video will outline the key steps to remove and install bezels compatible with our 40mm Divers.
If you need to reinstall any of the components, you can refer to this:
FINAL CHECK!

Check for proper watch functions by winding and setting time. When hands are being turned, check if they come into contact with other hands or parts.
Check for dust or dirt on crystal, hands, dial or other parts. If needed, you can remove the case to clean the inside.
Check if the case back is securely fastened. If not, water resistance capability of the watch might be compromised.