

Welcome to the DIY Watch Assembly Instruction
In the next two hours, you will dive into the world of watchmaking.
Please relax, take your time, and enjoy the fun of the craft of watchmaking!
Mosel Assembly Instructions
Before starting, you can familiarize yourself with the tools and parts needed:
Parts:
watch case
crown and stem
movement holder
dial
hands
movement
Tools:
tweezers
finger cots
hand pump
suede
Rodico
loupe
case opener
hand removal tools
protective film for hand removal
hand setting tool
peg wood
screwdriver (not included for Mosel Lite)

1: Dial and Movement Assembly Installation
1a. Opening the package and wearing finger cots
Introduction to what’s inside the package, and shows you how to wear finger cots to protect the movement.
Content:
introduce package content
how to wear finger cots, and why
1b. Preparing case parts
Your watch case comes pre-assembled in order to keep it clean. This part will show you the individual parts of a case.
Content:
How to open case back
How to place parts
The following video is for a two-pin case back opener. If you have a three-pin case back opener instead, please scroll pass this video below to access the tutorial for it.
1c. Precaution for movement installation
Mechanical movement is the soul of a watch. It takes great care to install it. In this part, we’ll show you what to be mindful of when you install the movement.
Content:
Introduction of different parts of a movement
Areas you should not touch
Areas you can apply pressure on
1d. Installing stem and crown
Reminders:
8N24 stem removal button location
82S0 stem removal button location
Watch assembly and basic watch repair require you to install and remove the stem and crown. You will need to do this multiple times throughout this workshop.
Content:
Function of crown
How to remove and install crown
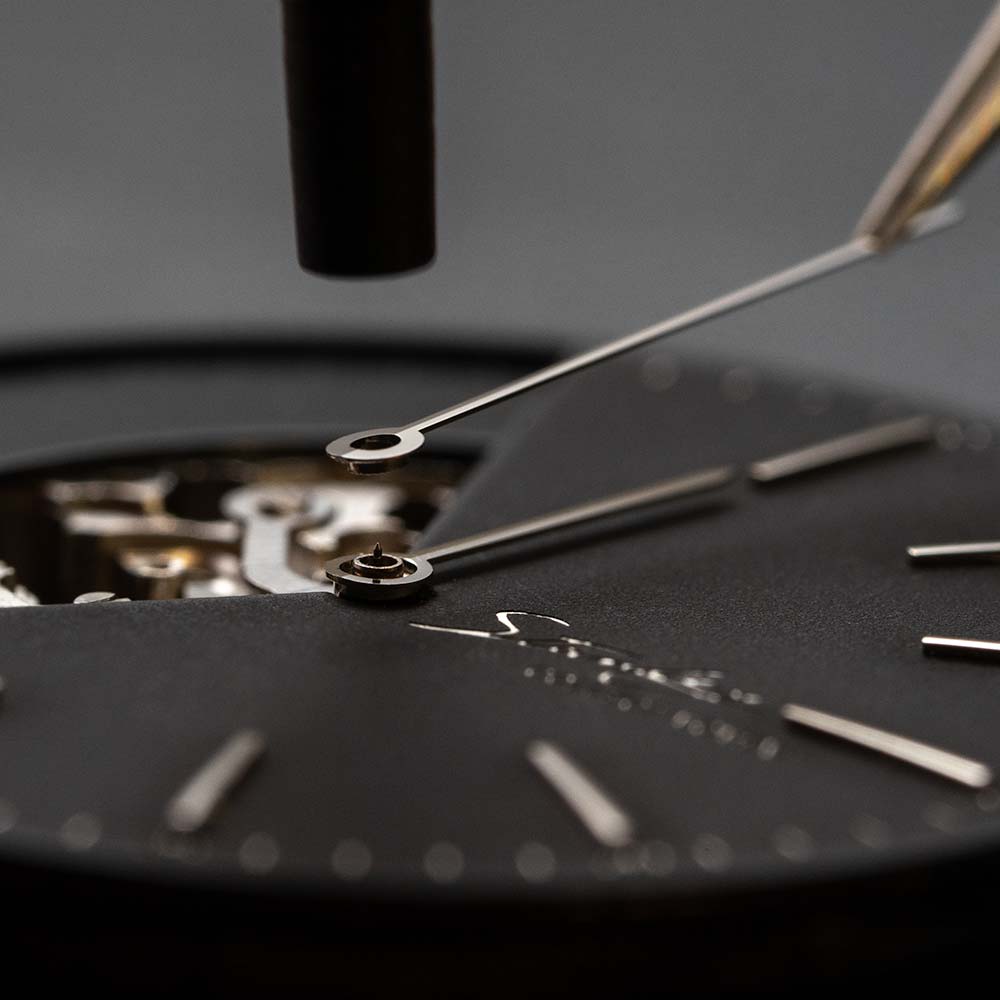
1e. Installing dial and movement
If you have our new Mosel Crystal Dial, you will have to assemble the two dial pieces together:

Other important notes:
Please try your best to keep the crystal (transparent part of the dial) as clean as possible
If the dial feet are not straight, you can adjust them slightly using your pair of tweezers; that should make the installation a bit easier.
For the alignment, follow the image below. Take note that the crystal is facing down; i.e., the texts on the dial should be flipped.

In this part, we will install the dial, movement holder, and movement. After assembling them, we will proceed to the next part, where we install the watch hands.
Content:
Install movement into movement holder
Install dial onto the movement

The new movement holder comes with three bulges, that go into three corresponding notches on the movement. This is designed to help aligning the holder with the movement.
If your movement holder does not have these bulges, installation can still be carried out normally.
Before proceeding, please check:
Dial and movement holder are properly assembled. The two feet at the back of the dial is correctly installed into the movement.
There can be a gap of less than 1mm between the dial and movement holder. Less is better.
2: Hand Installation and Adjustment
If this is your first time installing hands, it might be quite difficult. You can take a break first before continuing.
When you are ready, please select from the following instructions according to the style of your purchased watch kit, two-hand watch (with only hour and minute hand), or three-hand watch (hour, minute, and second hand):
3: Installing Case and Other Parts
3a. Cleaning parts and movement assembly
Instruction on how to clean parts and movement assembly
Content:
Using hand pump
Using rodico
Using peg wood
3b. Cleaning watch case
In this part, we will clean the watch case

1. This is the blue protective sticker on the crown.

2. Stick some sticky tape (normal one will do) onto the protective sticker. Press on it a few times to make sure it adhere to the tape completely.

3. Tear off the tape. The sticker will come off along with the tape.
Content:
Avoid touching the inside of case
Using rodico, peg wood, and suede for cleaning
The following tutorials differ depending on which version of movement holder you have:
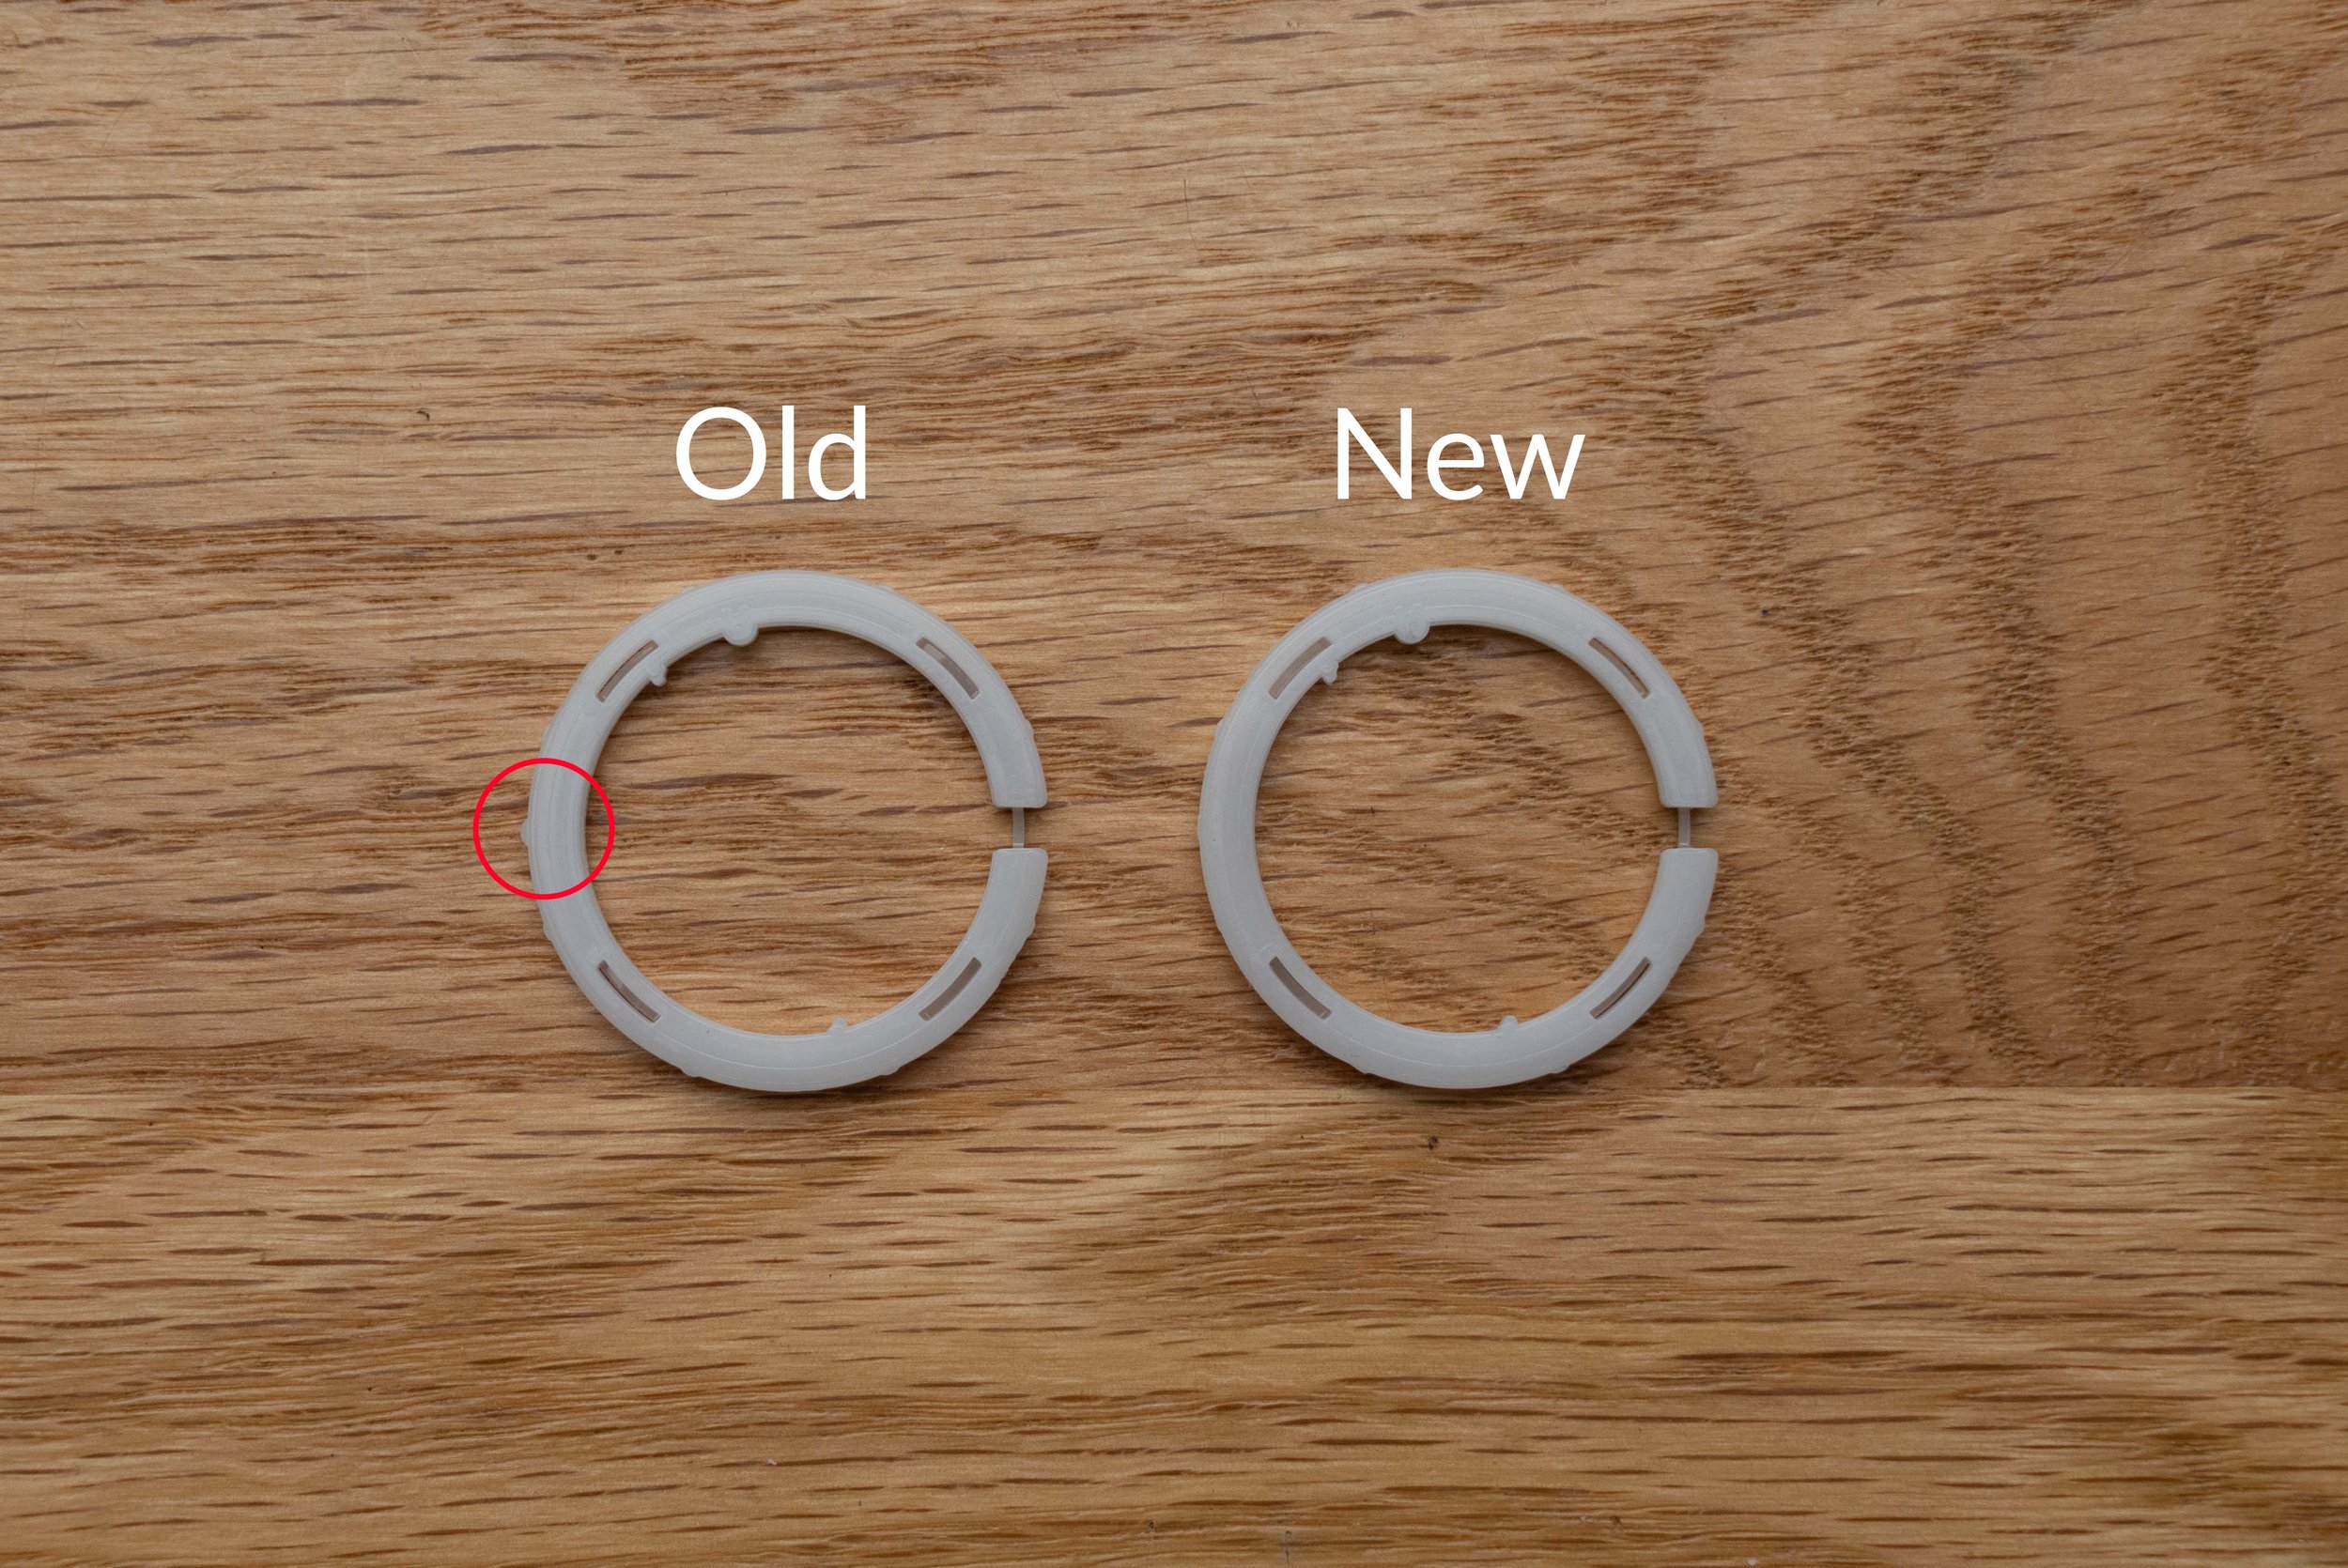
To distinguish between them, check the 9 o’clock spot on the holder:
If there is a small bulge at 9, it is the old version.
If there isn’t a bulge at 9, it is the new version.
Please select the movement holder you have below:
3c. Points of notice during casing
There are a few important pointers you need to keep in mind during casing. They will help you avoid problems that are hard to fix.
Content:
Do not touch the movement
Align 9 before 3
Keep as level as possible
Warning: Do not force the movement assembly into the case if it appears stuck. The dial can be caught by the inner bezel and be very difficult to remove.
3d. Installing watch case (with old holder)
In this part, we will install the movement assembly with hands into the case
Content:
Installing assembly
Aligning movement and stem
Case removal instruction
Installing case back
Final check
3c. Installing watch case (with new holder)
In this part, we will install the movement assembly with hands into the case
Content:
Installing assembly
Aligning movement and stem
Case removal instruction
Installing case back
Final check
3e. (optional) Installing custom rotor
If you have customised a rotor, replace the Miyota rotor with your custom rotor.
Content:
Finding the right screwdriver
Removing the rotor
Putting on the new rotor
If you need to reinstall, you can refer to this:
Final Check
Try winding and setting time, see if the watch functions properly. When hands are turned, check if they come into contact with other hands or parts.
Check for dust or dirt on crystal, hands, dial or other parts. If needed, you can remove the case to clean the inside.
Check if the case back is securely fastened. If not, water resistance capability of the watch might be compromised.